Fun Tailgate Food: Goat Cheese & Meat Stuffed Peppers

Baseball season is finally here and with that being an Oakland A’s fan means many tailgates.  I love tailgating for the friendship bonding time and getting to test out new recipes that sometimes make the camping menus on our trips.

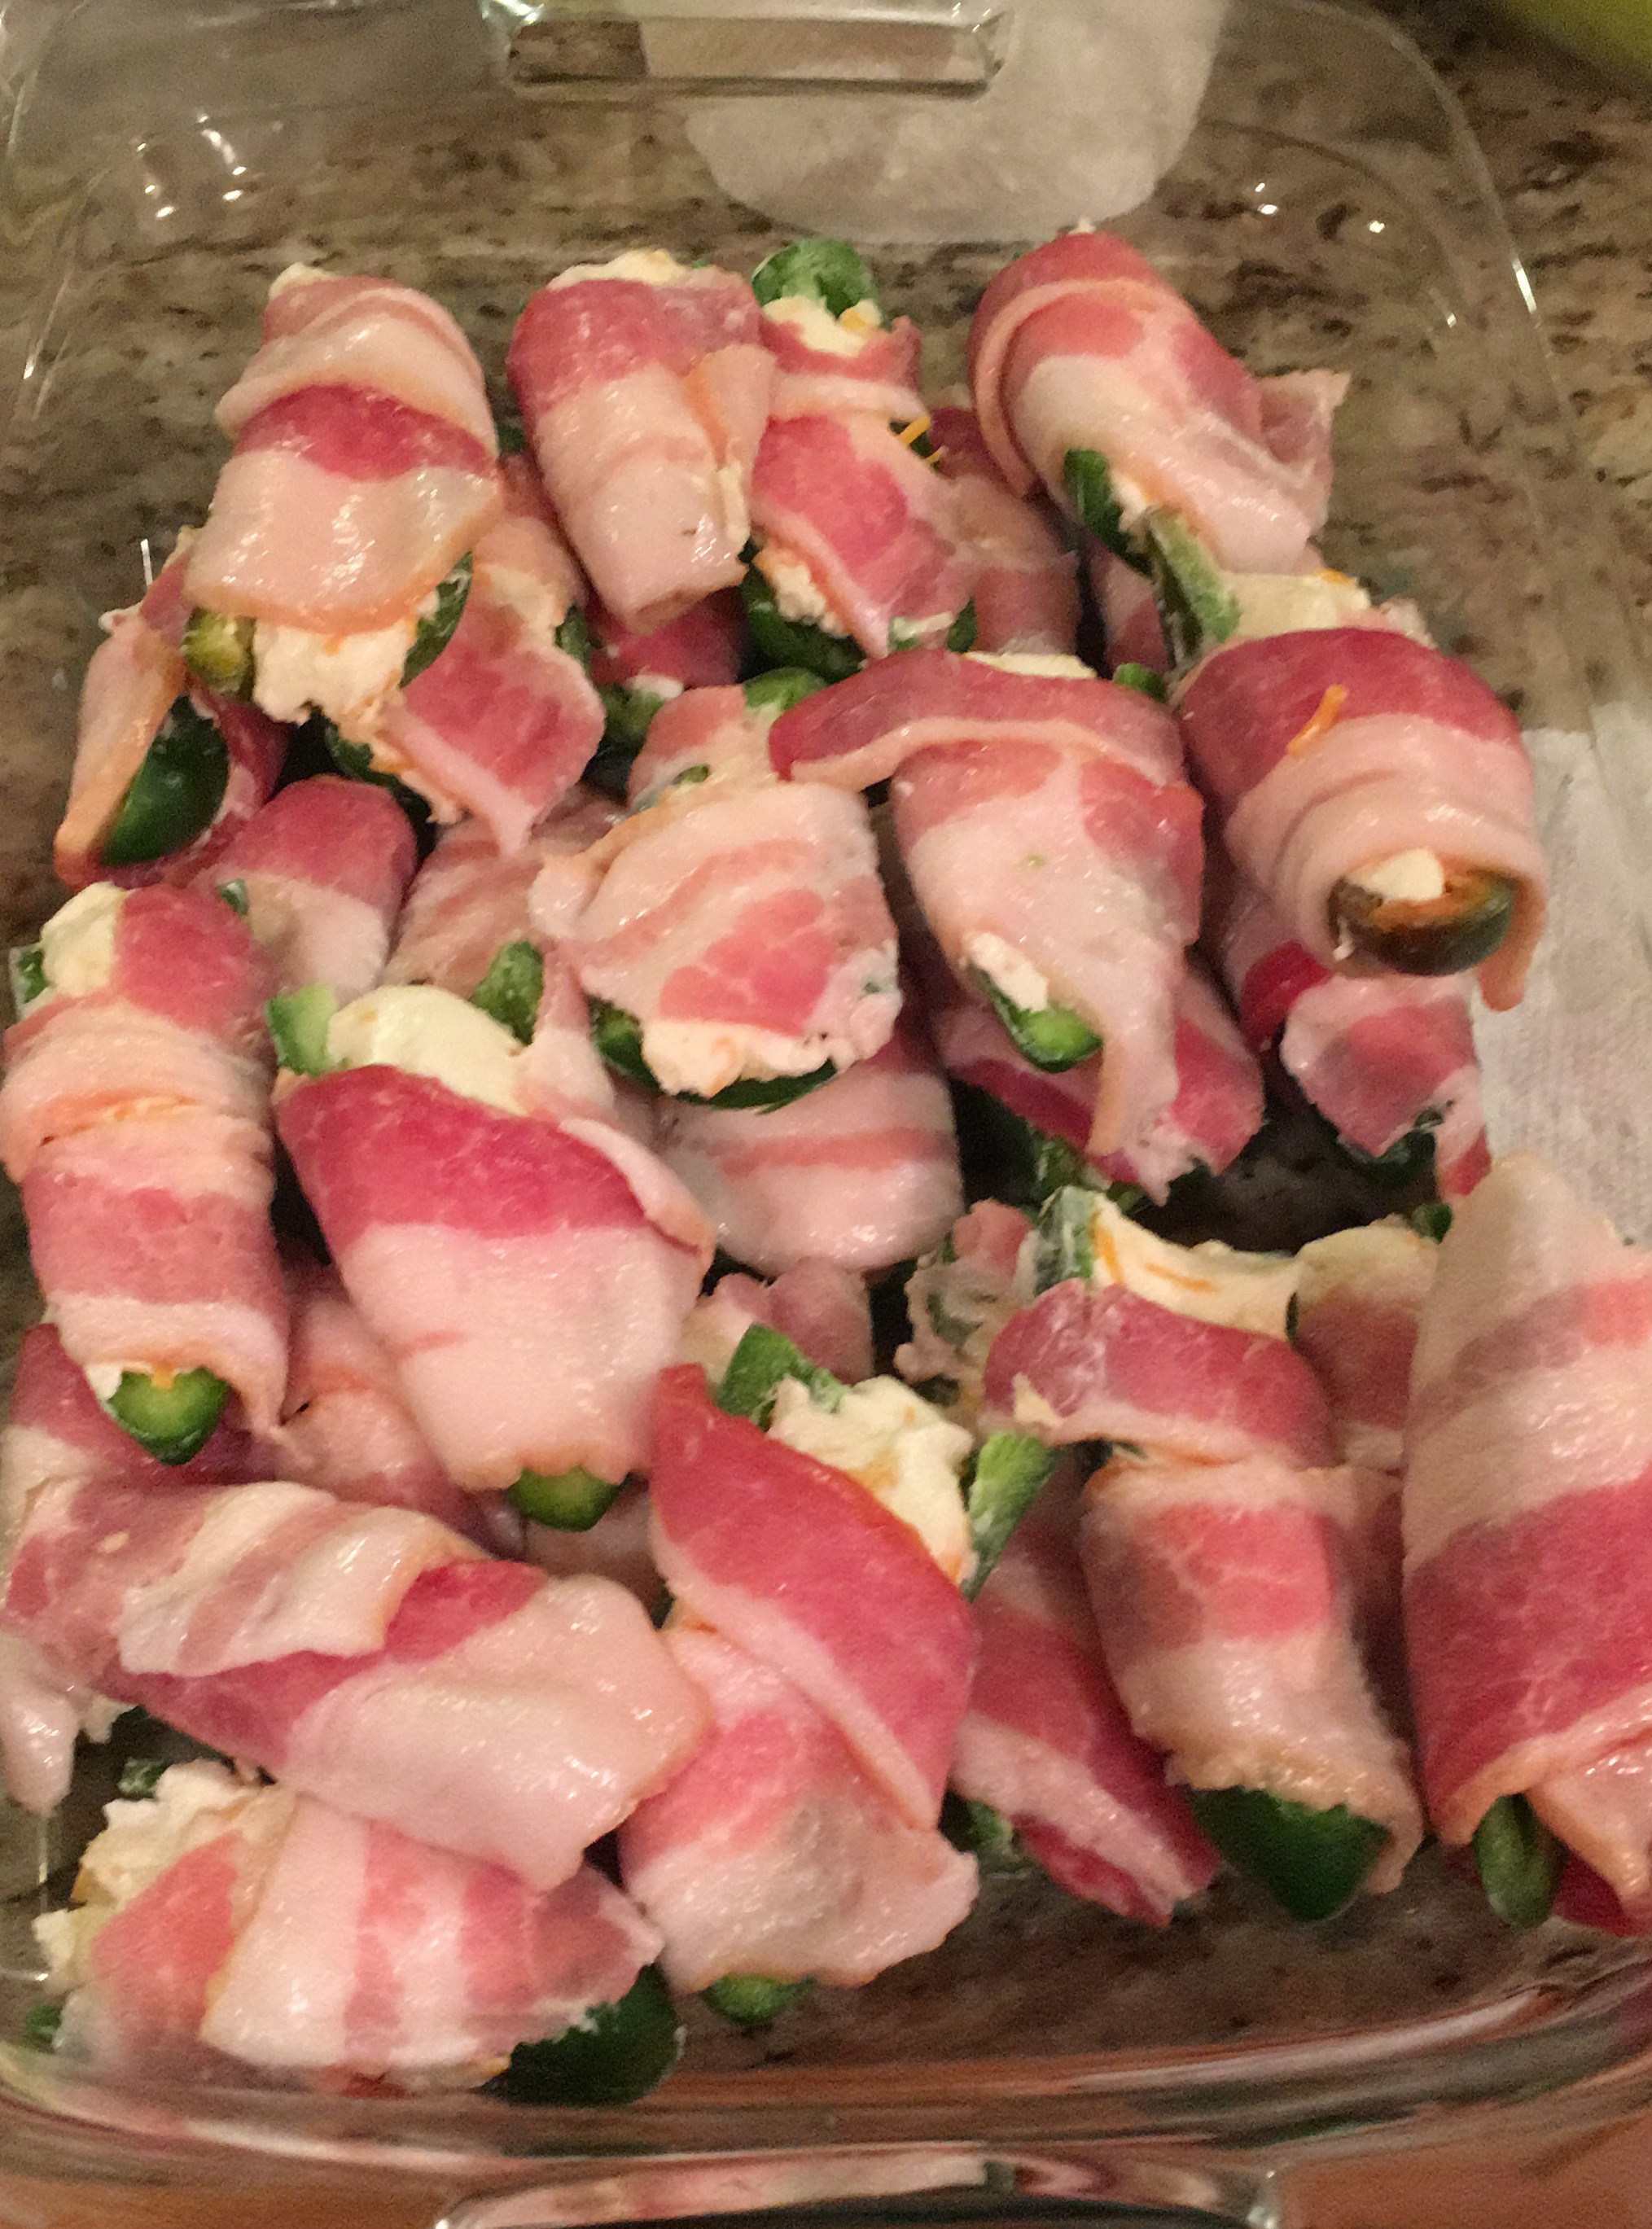
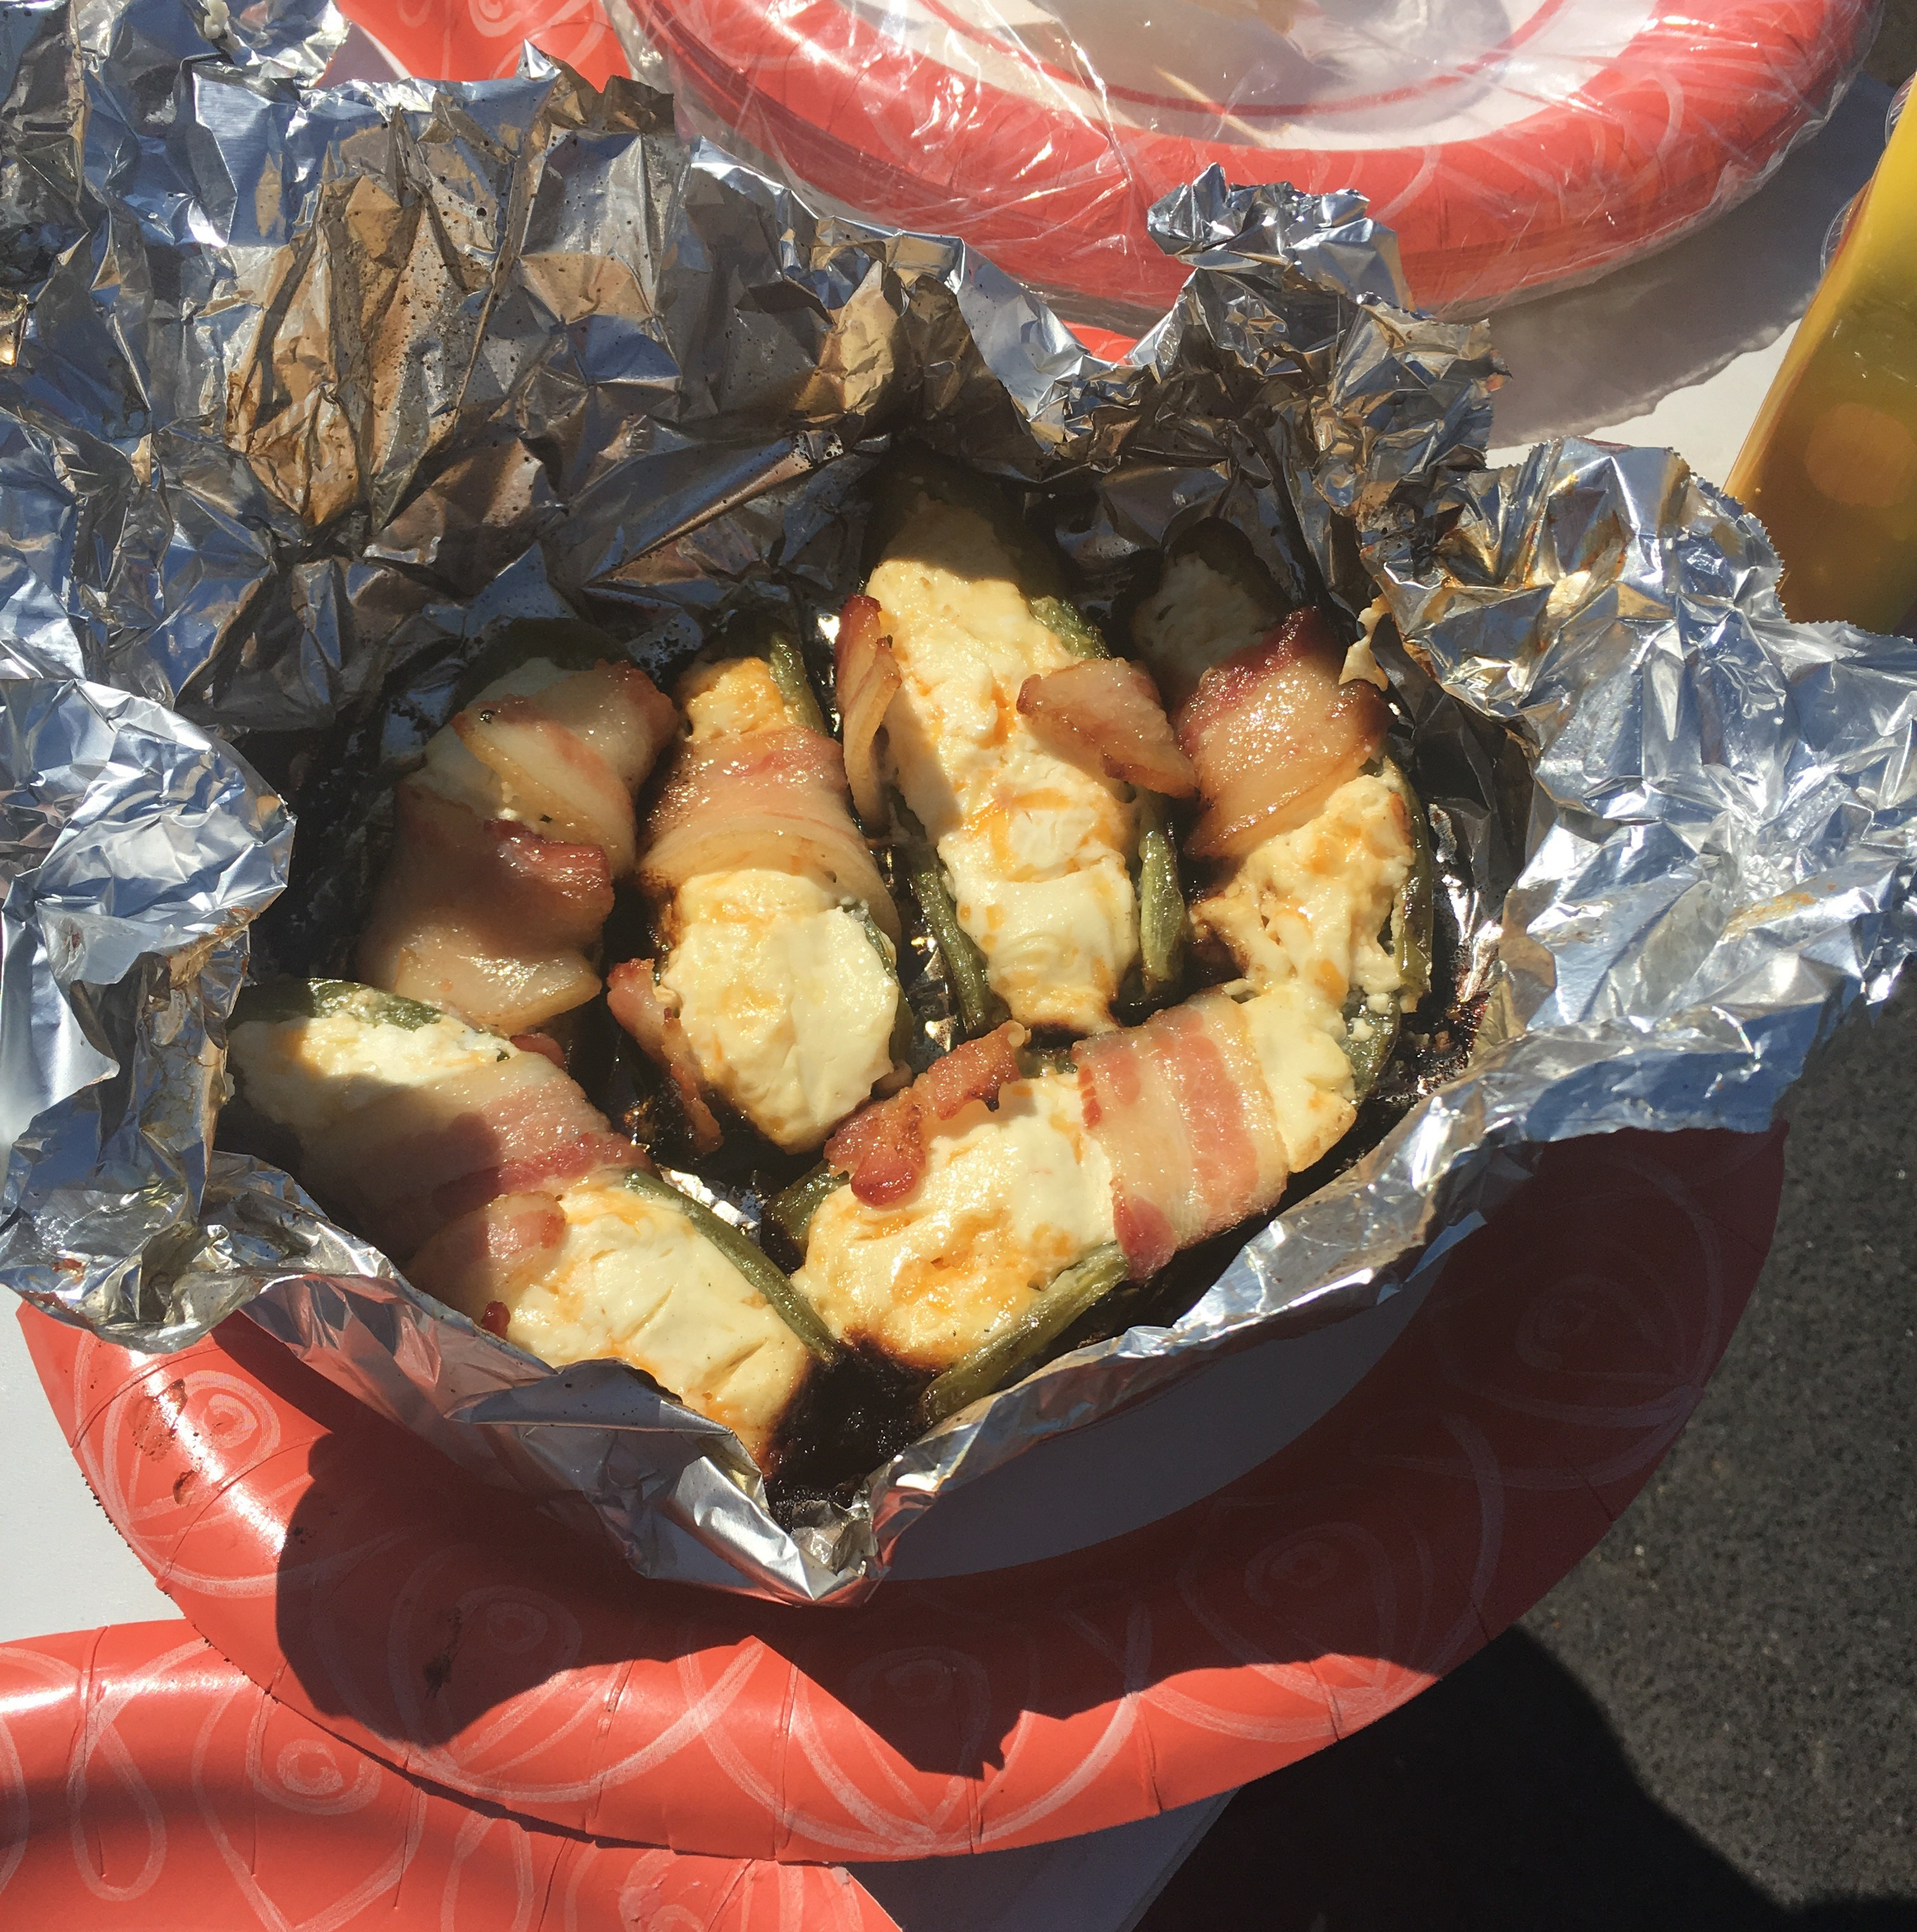
Usually my bacon wrapped jalapeno poppers are a staple for tailgates but lately it seems like all my friends are either Keto, Paleo or vegetarian so for our first tailgate of the season, I wanted to come up with something that everyone could eat.  So here I give you a meat option for those Keto and Paleo friends and a goat cheese option for the vegetarians.

Keto & Paleo Friendly Bell Beppers –

Ingredients:

  • Mini bell peppers – I grabbed the 1.5 lb at Costco
  • 1 lb. Ground beef (or turkey but I feel beef has a lot more flavor)
  • Taco seasoning packet
  • 1/2 to 3/4 cup Tomato sauce
  • Small onion
  • Tomatoes (optional)
  • Black olives (optional)

Directions:

  1. Slice mini bell peppers in half and scrape out the seeds
  2. Add a little bit of olive oil to pan and add and saute onions for a few minutes.  Then add ground beef and cook fully.
  3. Add taco seasoning to ground beef and the tomato sauce.  I added enough sauce that it was coated but not watery.  Let beef simmer for 5 minutes.  Remove from heat.
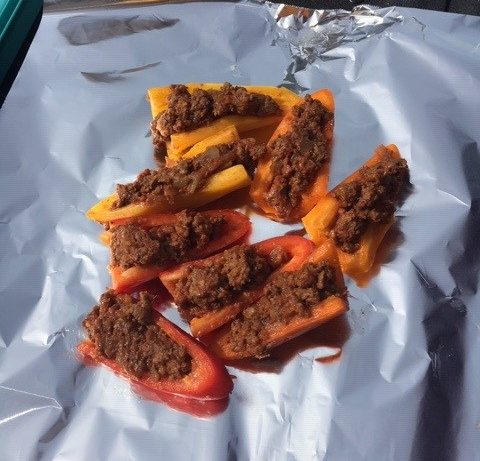
  4. Fill bell peppers with meat mixture
  5. Top with tomatoes and olives if you want.  The people in our group preferred no tomatoes or olives but really up to your audience
  6. Create foil packets and add bell peppers to them.  Grill for about 10 minutes or until the inside of the bell pepper looks heated through

MeatPeppers


Goat Cheese Mini Bell Peppers –

Ingredients:

  • Mini Bell Peppers
  • 10.5 oz. Goat Cheese Log – I find the Kirkland brand 2 pack goat cheese logs at Costco the best for value
  • 2/3 cup Shredded Parmesan Cheese
  • Three cloves of garlic, minced
  • 2 – 4 Jalapenos (depending on spice level), seeded and chopped

Directions:

  1. Slice mini bell peppers in half and scrape out the seeds
  2. In a large bowl, combine softened goat cheese, diced jalapenos, minced garlic, and shredded parmesan cheese
  3. Fill the mini bell peppers with the goat cheese mixture.  Note: I find just using your hands is the easiest for this and I fill them to almost overflowing the brim of the peppers
  4. Create foil packets and fill packets with bell peppers.  Grill for about 10 minutes or until cheese looks heated through and oozing.

I would love feedback! If you have tried this recipe, please rate below and/or comment!

Rating: 5 out of 5.

How to Make Flavorful Grilled Corn for Camping

Ok I love rain but I am officially tired of this constant rain in California right now. I saw blue skies the other day for a couple hours and my body rejoiced! Now I know this is what people in other states feel all the time and I swear I love the rain and so much patience but for once in my life, I never felt so happy to see sun and then realize how spoiled I normally am.

In any case, warm sunny weather normally gives me the ability to try out campfire meals on a grill before I go camping. This recipe actually came from something I normally make and my friends said “you should do this when we are camping”. What makes me so excited about this item is there are so many variations I can mess with!

Ingredients

  • Ears of corn (however many you are doing – for this I will do 4)
  • 1/2 cup mayonnaise
  • 1/2 cup cotija cheese
  • Chili powder
  • Lime
  • Cilantro (optional)

Directions

  1. Mix mayo, chili powder, cilantro and lime in a bowl until well blended.
  1. Rub generously over each ear of corn
  1. Sprinkle with cotija cheese
  1. Top with cayenne pepper
  1. Now here you can also mix it up on how to cook – grill corn before you smother it with ingridents or after. I personally like to prepare and then throw on grill but honestly up to you
  1. If you want to mix things up even more add other butter blends, herbs and spices!

I would love feedback! If you have tried this recipe, please rate below and/or comment!

Rating: 5 out of 5.

Easy Pancake Mix Recipe for Camping

One of my favorite traditions is this week – Mardi Gras!  Also known as Shrove Tuesday, Fat Tuesday and the main reason I love it – Pancake Tuesday.  I love a good breakfast for dinner sometimes, and during college, I always heated up my pan and put together crepes, or pancakes, with all the fixings for my roommates and I.  Of course some hurricanes always paired nicely.  So this week, I give you breakfast!

I make large batches of this mix before the summer starts so I always have it ready to go for camping trips throughout the season.  It’s also great just for an easy breakfast on the weekends.  Just bring this mix, a small thing of buttermilk and 2 eggs.

Fun camping hack!  Before every trip, I crack open eggs into a large bowl and very slightly beat (just to fit through the funnel).  I then use emptied and cleaned plastic water bottles that I collect before preparation and insert a funnel into one.  Then pour the eggs in through the funnel until full.  Seal tightly and save in the fridge until you load your cooler.  Of course you can’t do any crazy egg varieties this way (sunny side up, over easy) but works great for scrambled eggs, breakfast burritos and recipes like this that ask for 2 eggs!

Also this is one recipe I do on my small propane grill that I also bring.  You can very much do it on indirect heat in a cast iron on the campfire in the morning but I’m usually doing such a big breakfast, I’ll have both the small propane grill and campfire grill going at the same time and just end up doing the pancakes on the propane grill.

img_9112

Last year I got these stack-able pots and pans that I absolutely LOVE (see above)!  GSI Stackable Pots

They even come with a small cutting board.  It saves on space when packing the car, and gives you two pots, one saucepan and a cutting board all in the size of the big pan.  Totally worth the money and less stress of trying to find the right pans to bring.  If you are going to do the pancakes on the grill, I recommend a cast iron pan and melting a half stick of butter in the pan first to reduce sticking with the heat of a campfire.

Multi-use Baking Mix Recipe (adjust this to how much of a batch you want to make)-

  • 3 cups Flour
  • 1 tablespoon Sugar
  • 1 tablespoon Baking Powder
  • 1 teaspoon Baking Soda
  • 1 teaspoon Salt

Recipe –

  • 2 cups of Multi-use Baking Mix Recipe
  • 2 cups (475 ml) buttermilk
  • 2 eggs
  • Butter
  • Optional – chocolate chips, coconut, fruit slices you have at camp
  1. In a large bowl, whisk together 2 cups baking mix, 2 cups buttermilk and two eggs until well blended.
  2. Melt a little piece of butter in a medium saucepan (or half stick in a large cast iron).  Put 1/4 cup batter at a time into the skillet.
  3. If you want to add other items, spread on top of pancakes here.  Chocolate chips are of course a big hit with the kid campers!
  4. Cook edges look slightly brown and firm (about 3 – 5 min), then flip.
  5. Cook other side until golden brown and firm.
  6. Repeat until batter is gone.

I love to serve up with bacon and french pressed coffee!

Another fun tip – if you want to get people up at your campsite to start the day, start cooking bacon 😉

Laissez les bon temps rouler!

I would love feedback! If you have tried this recipe, please rate below and/or comment!

Rating: 5 out of 5.

How to Make Addictive Garlic Bread for Camping Trips

I love to make at least one pasta dish on a camping trip (see previous lasagna recipe) and what goes best with pasta? Garlic bread! It also just make a great snack or side dish for many meals. Warning – this garlic bread is highly addicting and I usually triple the portion you think normal people would eat when planning for the meal.

I think the first time I did this recipe while camping was at Mary Smith campground up near the town of Shasta. It’s a bit of a drive from the Bay Area but a pretty drive and the campground has nice hiking. Sadly when we went it was too cold to get into the water. Maybe next time!

Ingredients –

  • Loaf of French bread
  • 2 to 2 1/2 sticks of butter – accept it, love it, trust me!
  • Garlic – I use at least 8-9 cloves
  • Italian seasoning
  • Parmesan cheese – shredded
  • Foil

Directions –

  1. Cut french loaf in half longwise
  2. Mince garlic to fine pieces
  3. Mash room temp butter, minced garlic, a little bit of shredded Parmesan cheese and a couple teaspoons of Italian seasoning in a bowl until well combined
  4. Spread garlic, cheese, butter mixture evenly on the two layers of bread
  5. Top with more shredded Parmesan cheese
  6. Put each loaf separately in a piece of foil and fold up so foil creates a boat and top of bread doesn’t touch top of foil
  7. Place on indirect heat on campfire and cook for about 10 min or until bread is warmed and cheese on top is melted
  8. Remove from heat and slice into 2 inch pieces or eat as whole (just kidding but you’ll want to)

I would love feedback! If you have tried this recipe, please rate below and/or comment!

Rating: 5 out of 5.

How to Make the Best Bacon-Wrapped Jalapenos

This week marks the 10 year anniversary of my dad passing from ALS, and I can’t think of a better way of remembering him with baseball with my sis.  So as fate has it, an annual work conference that is normally earlier in the month got moved to this week and spring training starts on Thursday!  I can’t wait to root on my boys in green and gold with my sis! So this week’s recipe is going to be my fan favorite (at least as my friends tell me) – bacon wrapped jalapenos!

I’ve tried a few different ways of how to cook these but I find the best to wrap tightly and cook in a layer of foil sheet but you can insert toothpicks and cook in pan or come up with your own new way.  If you have a suggestion on best way to cook these, leave a comment.  I love trying new ways but for now this has been the best way

img_9514default

Ingredients

  • Large jalapenos (pick the largest you can find when purchasing)
  • Cream cheese
  • Shredded cheddar cheese
  • Bacon
  • Foil

Directions

  1. Mix cream cheese and cheddar cheese
  2. Cut jalapenos in half and clean out seeds and membranes (I recommend using gloves or a piece of paper towel in case they are spicy)
  3. Cut bacon in 2 or 3 pieces depending on how long the bacon is
  4. Fill the jalapeno with the cream cheese/cheddar mixture
  5. Wrap tightly with bacon
  6. Put into foil sheet and place over the fire in indirect heat (away from flames) or on a bbq grill
  7. Cook until bacon is done to your liking and cream cheese is boiling
img_7276.jpg

Note: Recommend letting them cool even though you will want to pop them in your mouth as soon as you take them off the heat 😉

I would love feedback! If you have tried this recipe, please rate below and/or comment!

Rating: 5 out of 5.

Refreshing Margaritas for Camping

Marg

In honor of my 20 year high school reunion shenanigans last night, I decided to do a cocktail post this week. So I’ve tried a few versions of these but I find the classic and basic one the best. However feel free to add anything that sounds tasty to you (I.e strawberries or jalapeños)

  • 1 can of limeade – I pour into a mason jar and keep in the freezer until I’m packing the cooler
  • Tequila – anejo or blanco are my go to’s
  • Club soda
  • Limes

Fill glass with ice. Add 1.5 oz shot of tequila. Add a large spoonful of the limeade. Fill remaining of the cup with club soda. Stir and garnish with a lime

Also if you want a little sweeter, I sometimes add a topper of Grand Mariner.

Cheers!

I would love feedback! If you have tried this recipe, please rate below and/or comment!


Delicious Campfire Lasagna: Cook with Family

Happy Sunday Funday everyone!   I thought today I would bring to you another entrée and crowd pleaser for dinners while camping.  I have to give my cousin Chrissy thanks for this one as she gave me the original recipe and some tips that I have added on to over the years.  For example, I’ve added spinach because I like some greens.  I’ve also played around with the type of meat I’ve added or don’t add at all.

I also have to mention that the last time I made this was this past July at my favorite camping site – Letts Lake.

Letts Lake

The place is beautiful and the last five miles are unpaved to get there which is always a roll of the dice with my Prius but I’ve made it at least 3 out of the 4 times I’ve tried.  I was fortunate to go literally two weeks before the Mendocino Complex Fire (specifically Ranch Fire) started and the campsite was evacuated and later burned in the same fire.  I cried a good amount after learning it burned.  But why do I even remember this so specifically?  Because this was the first time I had the genius idea to add Italian sausage to my lasagna.  The bees were so incredibly bad this past summer in California. The second I opened the sausage packet, hundreds of bees swarmed on me and the meat so quickly, that I had to abort the mission. I ended up kicking the sausage a few feet away from the campsite.  Next time, I will cook and cut the meat prior to going camping so I can quickly assemble and hopefully not have the swarm of bee issue.  On the other note, while I won’t be able to enjoy Letts Lake this upcoming summer, hopefully it will be back open in 2020.  I also pray all the animals and especially baby ducks are ok but the bees I will say I hope they won’t be returning (wishful thinking I know!)

So here you go – my and my cousin’s much loved combined lasagna recipe

Ingredients –

  • Oven Ready Lasagna Noodles
  • 2 jars of Rao’s Marinara Pasta Sauce (this part is VERY important.  Trust me – splurge and spend the $8 on a jar of delicious sauce – it makes all the difference)
  • 1 bag Mozzarella Cheese
  • 1 bag Cheddar Cheese
  • 1 bag Parmesan Cheese
  • Any kind of cooked meat you would like
  • Any vegetables you might like (I like spinach and zuchinni)
  • Italian Seasoning
  • Cast Iron Pan
  • Foil

Directions –

Line the cast iron with double foil (spillage of the marinara sauce in the cast iron is a real pain to clean when camping)

Make a layer of oven ready lasagna noodles

Spread a portion of sauce over noodles

Add a part of the vegetables that you want evenly over sauce/noodles combo

la1

Add any meat if you are having meat for the next layer

Add a layer of mozzarella and cheddar cheese

la2

Add another layer of oven ready noodles

Add another portion of sauce over noodles

Repeat vegetables, meat and cheese layers

If you are now at the top of your cast iron, add sauce to cover, remaining mozzarella & cheddar cheese and as much of the parmesan cheese that looks good to you. Top with

Italian seasoning and cover pan with foil

Put cast iron pan on indirect heat over the campfire

la3

Cook for about 45 min – an hour or when cheese is melted on top

Camping Lasagna

Enjoy!

I would love feedback! If you have tried this recipe, please rate below and/or comment!

Rating: 5 out of 5.

Delicious Campfire Monkey Bread Recipe

Campfire Monkey Bread

I have to admit, the first time I made this for my friends, I had never had monkey bread and had no idea how it would turn out.  It was such a hit (devoured in minutes) that it is a must have for at least one breakfast during every camping trip now!

Campfire Monkey Bread
Campfire Monkey Bread – Cinnamon Sugar Bread

Ingredients –

  • Cinnamon Sugar Mix (1 part cinnamon to 3 parts sugar mixed in a zip-lock bag.  I usually do 1 cup sugar to 1/3 cup cinnamon)
    • I will make this before we leave for the trip
  • 1 can of  Pillsbury Grands Original Flaky Biscuits
  • 1 stick of butter
  • 1/2 c. brown sugar

Instructions –

  1. Line a cast iron page with foil.  I usually double up to ensure easy cleanup.
  2. Remove biscuits from can and cut into fourths.
  3. Add a couple biscuits to cinnamon sugar mix and shake until coated
  4. Add biscuit pieces to the cast iron pan.
  5. Repeat until all biscuits have been coated with cinnamon sugar and lined in the pan.
  6. Melt 1 stick of butter and 1/2 cup of brown sugar in a small pan.  I usually have a small propane grill with me that I will use for this but can do on a campfire as well.  Once melted and mixed together, pour evenly over the biscuits in the pan.  Cover cast iron pan with a layer of foil and put over the campfire in indirect heat.  Make sure the pan is not completely over the flames as this will burn the bottoms more than you want. (A little burnt is bottom gives it a crunchy finish)
  7. Bake for about 45 min to an hour or once all of the biscuits have puffed up and look finished.
  8. Note: This is best cooked over hot coals with a lower flame

Remove from the fire, pull a piece off, and enjoy with a cup of coffee!

I would love feedback! If you have tried this recipe, please rate below and/or comment!

Rating: 5 out of 5.

How to Make Cheesy Enchiladas at the Campsite

enchilada1


This is my very first post!  And because it is my first, I thought I would start with one of the favorites that I get requested for a lot – my enchiladas.  You can make these vegetarian, or add more meat to cater to those in your camp group.  Whatever you do, just make sure you have plenty of cheese!
I usually use chicken for mine but you can use whatever kind of meat you like or are already cooking at your campsite.  For the chicken, I usually cook at home in my rotisserie and then shred and put into a large zip-lock bag before the trip to save time when at the campsite.

What you need –

  • 1 can of corn
  • 1 can of beans
  • 32 oz. can of enchilada sauce – mild to hot depending on the group (I like mine with heat)
  • 2 lbs. cooked and shredded chicken
  • package of corn tortillas
  • 4 cups of cheese – I usually use the Mexican blend
  • Cast Iron or Dutch Oven
  • Foil
  • Bag of tortilla chips

Directions –

  1. Cover the cast iron in a couple layers of foil for an easier cleanup
  2. Layer the bottom foil with corn tortillas overlapping each other
  3. Spread some of the canned corn and beans over the tortillas
  4. Add chicken over the corn and beans
  5. Spread 1/3 – 1/2 of the enchilada sauce over everything.
  6. Cover with cheese
  7. Add another layer of corn tortillas and repeat until you reach the top of the pan
  8. Top with the remaining cheese
  9. Cover the pan with foil and place over campfire but indirectly of the flames
  10. Cook for one hour or until cheese is fully melted and it looks heated through and sauce is bubbling

One thing to note here – this is supposed to be a casserole but I have found people enjoy eating is served in bowls almost like a soup or dip and eat with tortilla chips

I would love feedback! If you have tried this recipe, please rate below and/or comment!

Rating: 5 out of 5.